Data Entry and Selection
Data Entry
The data to be entered can be:
-
optional
-
mandatory: in this case, if the user has not entered them, they are highlighted before saving with the icon
 or with a red rectangle.
Manual Entry
- selecting one or more options with a left mouse click

- entering alphanumeric characters from the keyboard in edit-type fields
![]()
- selecting the desired option with a left mouse click, excluding others from the same group.

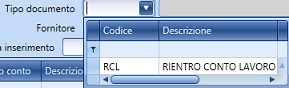
- selecting the data from the combo-box (see also Filter and sort records)
Entry with Field Help
-
in all fields that have a blue background, pressing F9 or double-clicking opens the field help where you can enter filters to search for the desired data (see also Data Search).
-
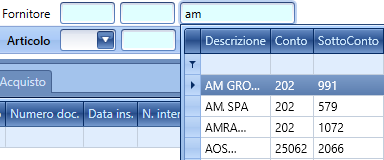
enter the data even partially and choose the desired data from the list that appears. The application will automatically fill in all other fields of the help. In the example next to it, for the Supplier, the first field is the account, the second is the sub-account, and the third is the supplier description. By entering the characters 'am', the list appears with alternatives from which you can select the record.
Entry with Copy & Paste
Depending on the type of field where the user is positioned, a form opens with a right mouse click that allows pasting the previously copied text.

Data Selection
Field/Row Selection
You can select a field (by positioning on the desired one) or an entire row (going to the beginning of the row and clicking on the icon ![]() ).
).
Multiple Data Selection
You can perform this on a field by clicking with the left mouse button and holding it down while moving up or down over the rows you wish to select. In certain fields, you can right-click to choose the option Select All for the table/field on which the user is positioned (see image above).