New Newsletter
The process of creating a new Newsletter allows you to define the characteristics of the Newsletter that will be sent, from the Template to the distribution lists.
The form is divided into two parts.
In the upper part, the following fields are present:
Title: corresponds to the code of the Newsletter;
Description: alphanumeric field to indicate the detailed meaning of the Newsletter;
Template: used to select the Template;
Author: indicates the user who created the newsletter;
From: in this field, the email address from which the Newsletter will be sent to the recipients must be indicated;
Creation date: corresponds to the creation date of the newsletter;
Scheduled Date and Time: corresponds to the scheduled date and time for the sending of the newsletter (purely indicative field);
Subject: corresponds to what is usually called the Subject of the email;
Scheduled: this flag is used to indicate that the sending of the newsletter has been scheduled (purely indicative field);
Sent: this flag indicates that the Newsletter has been sent.

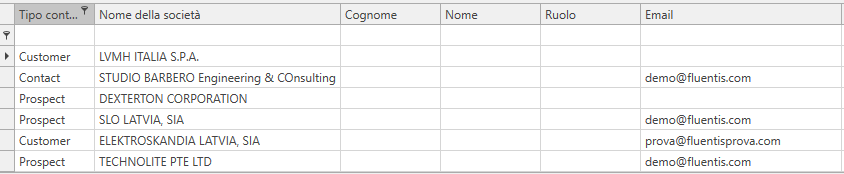
In the lower part of the form, the distribution lists containing the subjects and their respective email addresses to which the newsletter should be sent must be selected.

By pressing the button ![]() to the left of the individual list, it will be possible to view the contacts belonging to that list:
to the left of the individual list, it will be possible to view the contacts belonging to that list:
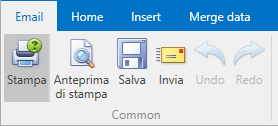
To send the Newsletter, once the parameters shown previously are indicated, it is necessary to press the Send button ![]() present on the Ribbon bar. This will open the actual sending form of the Newsletter, which presents the tabs Home, Insert, and Merge Data, already present in the Document Template section (for more information, refer to the Template section), along with the Email tab that presents the following functions:
present on the Ribbon bar. This will open the actual sending form of the Newsletter, which presents the tabs Home, Insert, and Merge Data, already present in the Document Template section (for more information, refer to the Template section), along with the Email tab that presents the following functions:
Print Report: Button to perform the physical printing of the newsletter;
Print Preview: Button to perform the print preview of the newsletter;
Save: Button to save changes to the Newsletter;
Submit: Button to send the Newsletter;
Undo: Button to cancel the last modification to the newsletter;
Redo: Button to restore the last modification to the newsletter
In the section below, some fields are present, some of which are carried over from the previous form:
Recipients: this field allows you to specify the email recipients by selecting them from the CRM contacts or from the users of Fluentis;
Subject: corresponds to what is usually called the Subject of the email;
Mail Template: used to select the Template;
Cc: used to indicate the email addresses that should receive the email in carbon copy;
Bcc: used to indicate the email addresses that should receive the email in blind carbon copy. Fluentis automatically fills this field with the email addresses of the Fluentis CRM contacts so that each recipient receiving the newsletter does not see the email addresses of other recipients;
Embedded image: checking this flag will mean that any images included in the template will not be inserted as attachments to the created email but as actual elements of the email;
Attachments: the files that will be attached to the Newsletter are displayed.