New Template
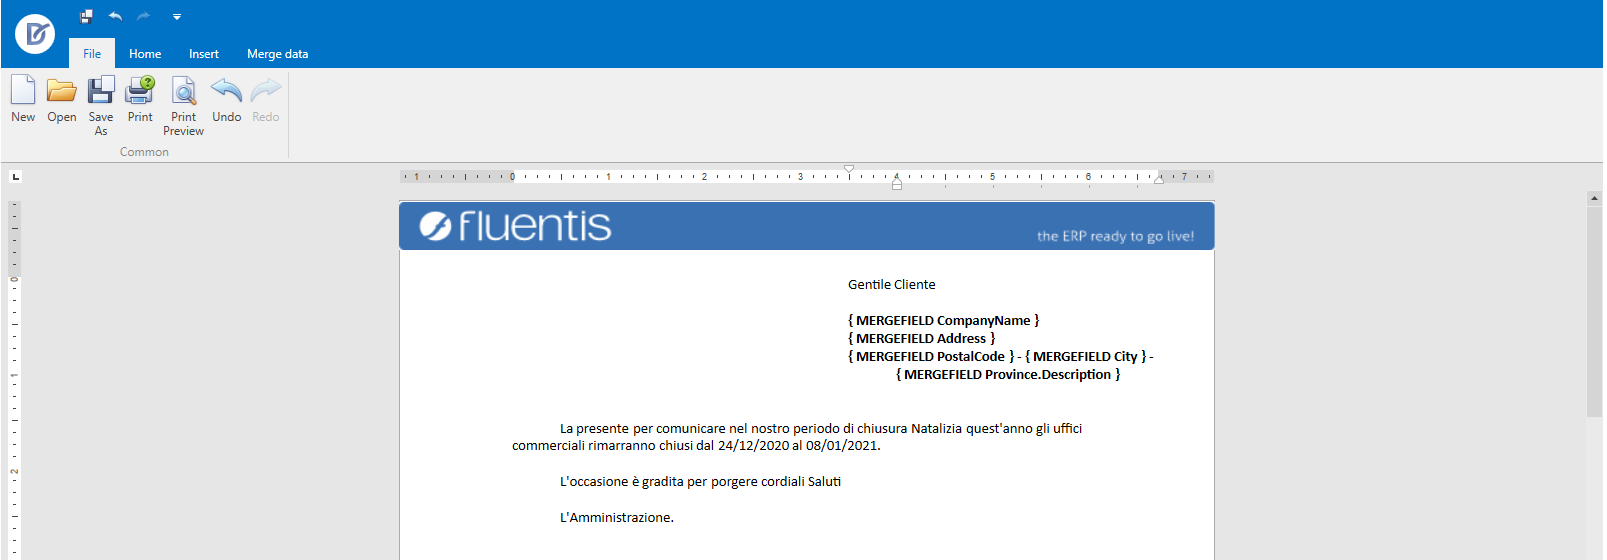
The procedure for creating a new Template allows you to define the characteristics of the Template that will then be used in the newsletter sending procedure, including images, text, hyperlinks, and merge data. The form consists of two sections.
The upper section allows you to define the following information:
First Name: corresponds to the code by which the Template will be identified;
Description: is the description of the template;
Business Object: is the Fluentis business object for which the Template can be used;
Data Source Type: is the type of data source on which the template is based (Simple, GroupBy, and SQL Query);
DataSource: is the data source that will be used by the Template for compiling the Merge Data.
The lower part of the form includes a series of tabs with different functions to construct the template and the workspace where you will actually build the Template and visually display the result:
Below are the tabs present in the form.
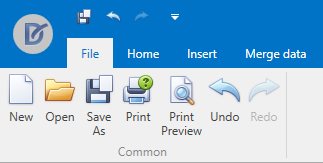
File
This tab allows basic operations of the Template, such as opening a new worksheet, opening another worksheet, and print preview of the Template.
New: opens a new worksheet;
Open: opens another worksheet;
Save As: allows you to save the worksheet under a name on the PC;
Print: allows you to print the worksheet;
Print Preview: allows you to preview the print of the worksheet on the screen;
Undo: cancels the last modification to the template;
Redo: restores the last modification canceled to the template.
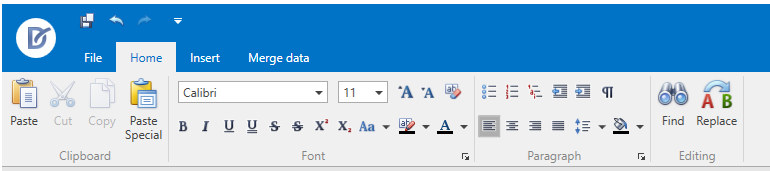
Home
This Tab contains buttons for basic text editing functionalities of the Template, such as font sizes, lists, text alignment, etc.
It invokes the basic functions of the most common text editors, such as Microsoft Word.
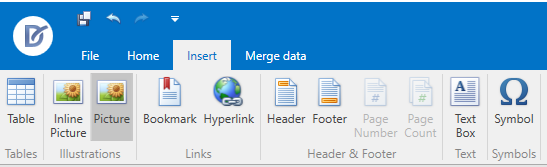
Insert
This Tab contains buttons to insert some elements into the Template, such as tables, images, and Hyperlinks.
Table: allows the insertion of a table within the worksheet;
Inline Picture: allows you to insert an image in the body of the document;
Picture: allows you to insert an image in the body of the document;
Bookmark: allows you to insert a bookmark within the template;
Hyperlink: allows you to insert a link to a web page or a bookmark of the template;
Header: allows you to insert the header of the template;
Footer: allows you to insert the footer of the template;
Page Number: is used to indicate the page number in the header or footer of the Template;
Page Count: is used to indicate the total number of pages of the template in the header or footer;
Text Box: allows you to insert a text box in the Template;
Symbol: is used to insert a special symbol within the Template.
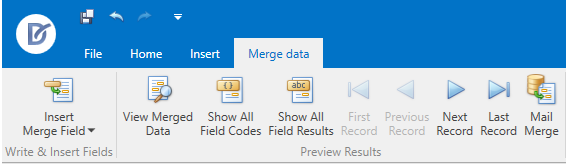
Merge data
This tab contains the buttons necessary for managing and inserting merge data.
Insert Merge Field: This button allows you to insert merge data by selecting them from a list based on the Data Source to which the Template refers;
View Merged Data: the button allows you to hide/show the merge data inserted in the template;
Show All Field Codes: the button is used to show the field codes used as merge data;
Show All Field Results: the button is used to show the results of extracting the fields used as merge data;
First Record: allows you to position yourself on the first record extracted from the merge data;
Previous Record: allows you to position yourself on the previous record compared to the current one extracted from the merge data;
Next Record: allows you to position yourself on the next record compared to the current one extracted from the merge data;
Last Record: allows you to position yourself on the last record extracted from the merge data.