General
General
In this tab, all the general information related to the registry that you want to insert will be entered.
The window consists of a first section where the information related to the Data that is purely registry information of the company will be entered, and a second section composed of two tabs, References and Alternative address, where the contact persons and any alternative addresses will be entered in case of a company with multiple locations.
Registry Data
Company Name: this is the field where the name of the entity is defined: it will be assigned to all the accounting detail accounts defined for the registry in use and will be reported in every accounting/document print.
Based on the text entered here, upon exiting the field, the management system will automatically generate a ‘Nickname,’ which is a short, unique code identifying the registry itself: this can be modified by the user but must be unique in the list of all registries. Since the search for the subject (if accounting) will typically be done based on the company name, this field is not particularly relevant.
VAT Number: a field composed of the international ISO code of the country (defined in the Nations table) and the corresponding VAT number. The field is subject to validity checks of the control character for Italian VAT numbers (the check is performed upon exiting the field). Once the VAT number is set, in the case of a European subject, using the ‘Propose data’ button, it is possible to request verification and reception of the available data from the VIES community database: for some countries, the address corresponding to the requested VAT number is also returned, which will populate the fields in Fluentis.
Tax Code: a field for entering the tax code of the subject;
Natural or Legal Person: indicates whether the subject is a private individual or not;
Accounting: a flag present by default in new entries, it will allow defining the details of finance/commercial management for the detail accounts associated with the registry in use.
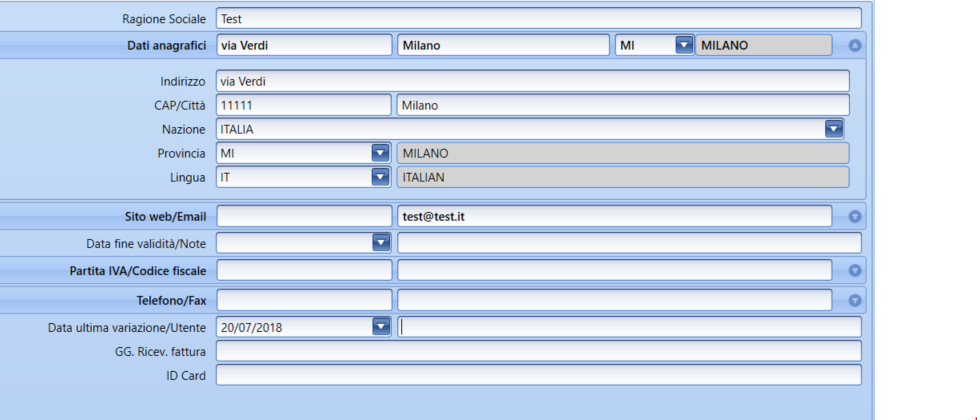
Address: the address of the legal headquarters;
Civic Number: the civic number of the address;
Building: the optional building of the address;
Postal Code: the postal code; it can be written manually or derived from the selection of the municipality (next field) using the help for municipalities;
Municipality: an editable field where the municipality of the legal headquarters can be inserted. There is a help for Municipalities to search in the list of municipalities as defined in the table (Home>Tables>General Settings);
Legal Nature: legal nature, the list is linked to the country of the contact;
Province: an editable field where the province code can be entered. There is a help for Provinces to search in the list of provinces as defined in the table (Home>Tables>General Settings);
Notes: a free field where you can define, for example, the full text of the address to be reported on document prints, without having to combine address + postal code + municipality + province;
Country: code of the country for the registry in use, as defined in the table (Home>Tables>General Settings). It should be noted that this field is the basis for identifying subjects present in countries with privileged taxation (Home>Tables>General Settings>Black list countries), for the related tax declaration of the finance area;
Region: code of the belonging region (Home>Tables>General Settings);
Language: language code (Home>Tables>General Settings) for communications addressed to the registry in use. It is possible to automatically generate reports in the language based on the dictionary defined in ARM (Application Resource Manager);
First Name and Last Name: for individuals;
Place of Birth, Province Code of Birth, Date of Birth, Gender: for individuals;
Phone/Cell Phone: field for entering the main phone or mobile number of the contact;
Fax: field for entering the main fax number of the contact;
Website: field for entering the website of the contact;
Email: field for entering the default email address of the contact;
Date/User of last change: field that displays the user and date of the last save made for the registry in use;
End of Validity Date: a field to block the use of the registry in use. Once this date is set, the system will ask whether to apply this end of validity to all the associated accounting detail accounts: none, the only active entity, all entities, or cancel the modification;
Notes: a field where any notes related to the subject can be entered;
Specific Buttons - Automatic Entry of Registry Data
Propose data: by entering the VAT register number in the relevant registry field, and clicking on Propose Data, the system will use a web service to query the V.I.E.S. IT system to check the validity and correctness of the VAT number of the subject. If the data is correct, the system will automatically suggest the rest of the basic registry data without the need for manual entry. For more information regarding the V.I.E.S. system, click on the link.
References
In the Web Access section, it is possible to enable access via Internet Explorer to the application, enabling the registry and assigning the username and password for access;
In the EDI code section, it is possible to enter the code for file transfer via the EDI process with the corresponding internal number assigned to the subject and the ability to indicate whether the code refers to a seller.
In the Other Data section, you can enter the customer number, the n. reg. autotransport, meaning for registries related to transporters, it is the subject's code in the register of transporters; and the date of birth in the case of an individual.
In the Contacts grid, you can specify, for the contact in use, the list of reference persons present within it with a description of the role occupied, and the relevant phone contacts and/or email addresses.
In the Detail accounts in all companies grid, you can see if accounting use has been defined for the registry in use in another company; the grid will then display a list of the various assigned detail accounts with their corresponding reference company.
Alternative Addresses
Here you can enter some alternative addresses that depend on the Associated Address Type
Note: these are not the delivery addresses for which the Delivery tab has been developed in the Accounting Data section where you enter the Recipients/Destinations of the goods to allow complete management in the documents.
The most frequent function of this section is especially the management of email addresses to automate the sending of documents, usually print reports, via workflow (operational flows with state transitions to manage within the masks) primarily through bulk email sending.
Example: If we select the address type 'Commercial Office' in the grid, we will insert one or more contacts for the commercial office to which, for example, order confirmations should be sent via email. The email should be indicated in the section next to the grid where you can also enter the phone reference of the contact and other registry-type data. In this case, when an order is entered, in the Summaries tab, when choosing to send the order confirmation to the customer, a screen will open with the preview of the email with the recipient's address already populated with the information that has been entered in this section, and it will not be necessary to add it manually each time. Depending on the type of address, it will be possible to choose to whom to send invoices, supplier orders, etc.
Therefore, the Alternative Addresses form does not allow for data management in subsequent active/passive cycle documents.
Its function, in addition to a possible simple entry of alternative addresses (especially emails), is limited to two possible automations that are very useful:
-
Management of email addresses in bulk document sending (Sales invoices, but also other types with prior configuration) via a shipping queue managed by the Bizlink component.
-
Management of Co-owners of the sales invoice.
Address Entry Procedure
Before entering detailed information in the right part of the form (within the various specific fields), it is necessary to enter at least one line in the left grid corresponding to an address type.
Address Type: code of the address type. The combo box is linked to the Address Types table (which is found on Home > Tables > General Settings).
Address: description corresponding to the code contained in the previous field.
Description: a mandatory field for saving, it is simply an additional description for the row being inserted.
Once the row with the selected address type has been entered, it is possible to fill in the corresponding detail data.
It is possible to enter and manage more than one email address at the same time (for sending, for example, to multiple recipients) by entering the addresses in the same field and separating them with a semicolon ( ; ).
Bulk Document Sending via Email
For the automatic management of the email address in the bulk sending of sales invoices (see also the attachment at the beginning of this article), it is necessary to use a particular type of address (which can be coded at will, as long as it has in the Address Types table the flag Email Invoice activated).
It will also be possible, following configuration, to manage bulk sending on other types of documents (e.g., payment reminders, etc.) by linking the entered email address to a specific type of address to be configured, using one of the other flags available in the address types table. In this case, it will be necessary to define both the specific document Transformation and a dedicated Workflow (state change).
The management of the entered and coded email address associated with the Email Invoice flag is also linked to the automatic composition of the accompanying email (Outlook installation on your PC is necessary) which can be executed once within the Sales Invoice after previewing the print, using the Send (Pdf, Word, etc.) command.
Co-owner Management
In this case, the relevant data is the name of the co-owners. It will be necessary to enter one row for each co-owner to input their registry data. The correct type of address to associate in the Address Types table and Co-owners.
For invoice management, see here.
Once the General information is entered, you will proceed to enter specific information in the next Accounting data tab.
Historical Data
This section serves to manage the possibility of historicizing, or storing changes, in the general data, such as a change of company name or address, etc. of the subject in question, such as a customer or a supplier.
In particular, a change of company name will automatically modify (although a confirmation message must be accepted) the description of the accounting detail accounts of the chart of accounts assigned to the contact registry.
Therefore, the need to store the previous data is particularly felt to track documents and other data entered through the previous reference.
In the form, there is a Left grid that will hold the date of the change and will serve as a reference to display the old or new data.
On the Right side, the fields related to the contact data are repeated, which will be automatically filled by the historicization procedure. Later, the General part can be modified with the updated current data.
Specific Buttons
Historicize registry data: placed in the ribbon bar is the main button for the historicization (storage) procedure of the data. Pressing it opens a popup that asks for the Validity end date which will be reported in the Left grid, while the current data will be copied to the Right part for further modification.
Delete history: Removes the end of validity date and the data entered on the Right side.
- Press the Store nomenclature data button.
- In the popup that appears, specify the date of the change, i.e., the date from which the data (e.g., the company name has changed). Confirming the "old" data, currently still present, is saved.
- Modify the data in the Nomenclature data* tab and press Save.
From this moment, the "old" (historical) data is available in various standard print reports such as VAT registers, sales invoices, etc. (in addition to being optionally included in custom-defined or newly created reports) and will automatically show the old data if the document refers to a date prior to the end of validity date.
The data displayed in the ERP screens is always the currently updated data; it is not possible to have a view of the historical data.
This section allows for the management of historical data solely for printing reports.
It is recommended to copy the field and any related formulas for managing visibility based on the reference date from a standard report (or at least review them) in the case of use in a custom print report.