Load Request Objects
How to Display Additional Fields in Forms
To add properties not present in the forms, it must be verified that the properties are present in the LoadRequest of the object.
Load New Properties
Examples:
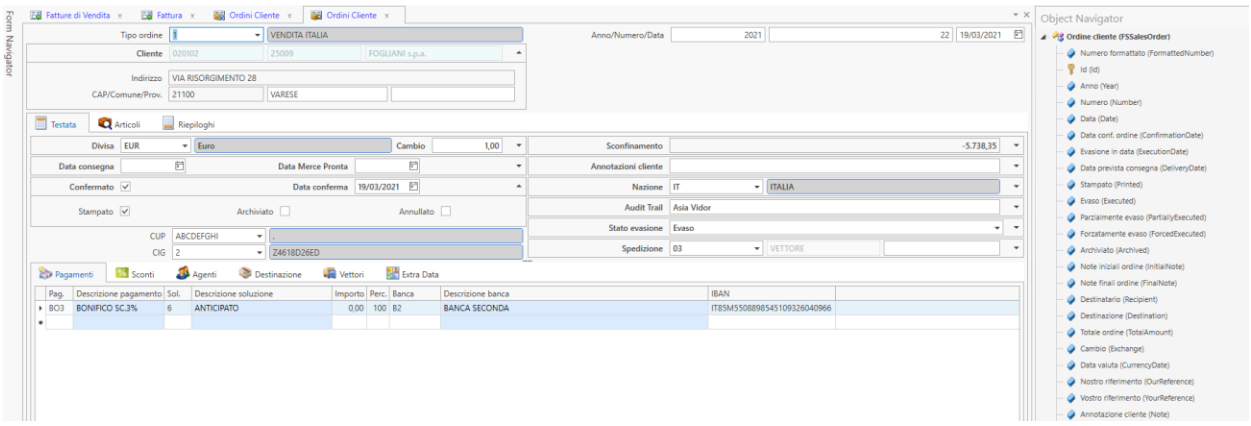
- add the VAT register number and the Fiscal Code in the customer expander, in the Header of customer orders.
- add SWIFT to the grid of Payments of customer orders.
-
fix the Object Navigator panel so that it is always visible until the additional fields are defined, that is, up to the moment before creating the custom profile.
-
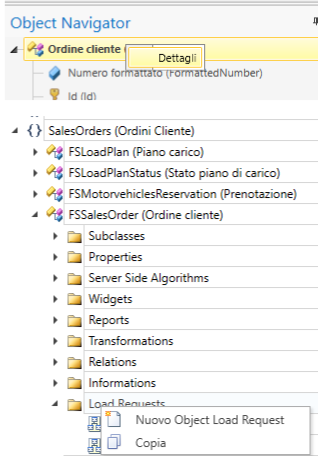
in the Object Navigator, right click on the name of the object, go to Details, and navigate to the Load Request of the object section and right-click to select New Object Load Request.
-
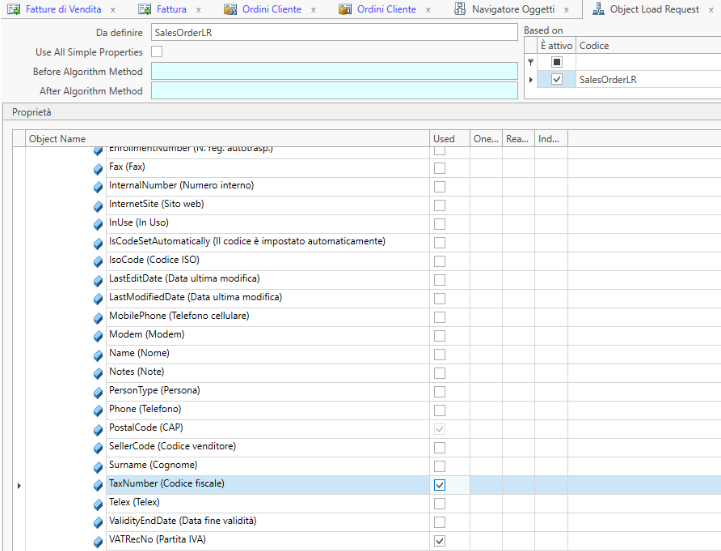
open a New Load Request where you input the same code as the Standard Load Request and then save it so that all properties of the object are loaded.
-
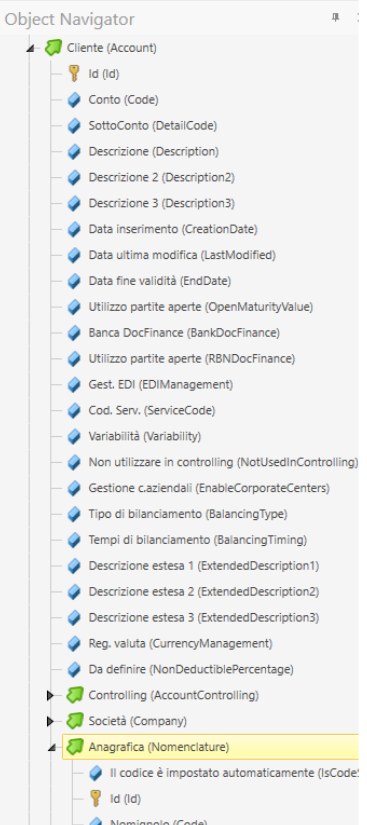
search in the object tree for the interested properties.
In this case, we went under the reference Client and within the reference Register to find Fiscal Code and VAT register number, and selected them.
- still in the same form, in the Based on grid, activate the Code of the LoadRequest so that all the properties present in this Custom Load Request will be loaded during execution.
- close the form.
Adding Properties to the Form Header
6.1. on the left side of the Fluentis form to customize, open and keep open Form Navigator.
6.2. open the tree of the form and activate the form in Customization Mode.
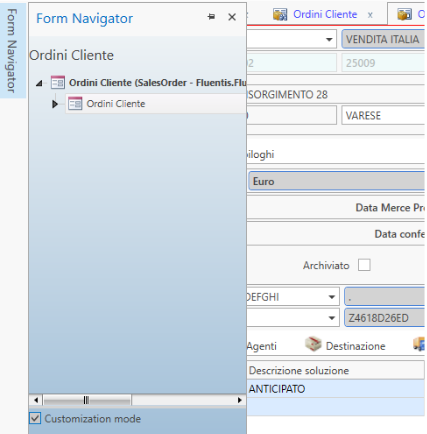
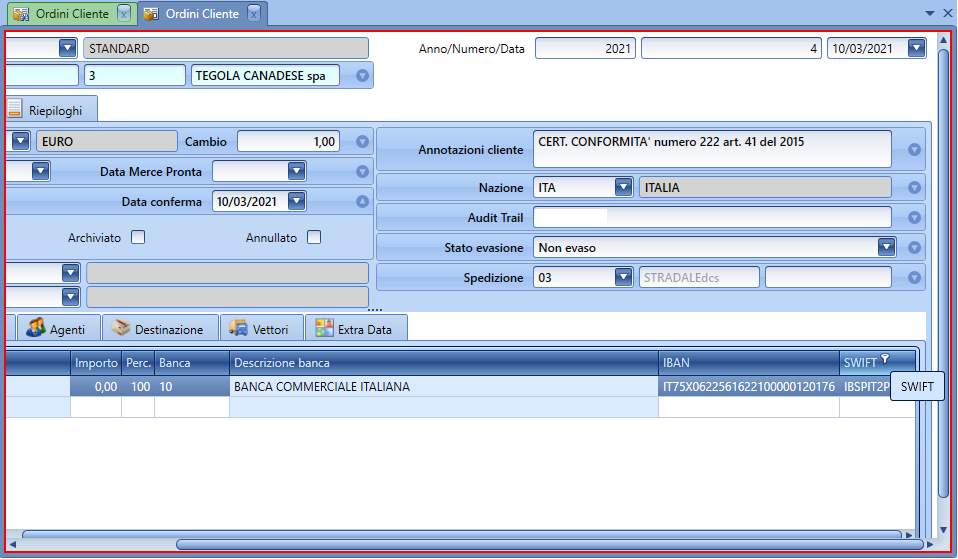
At this point, the form is outlined in red:
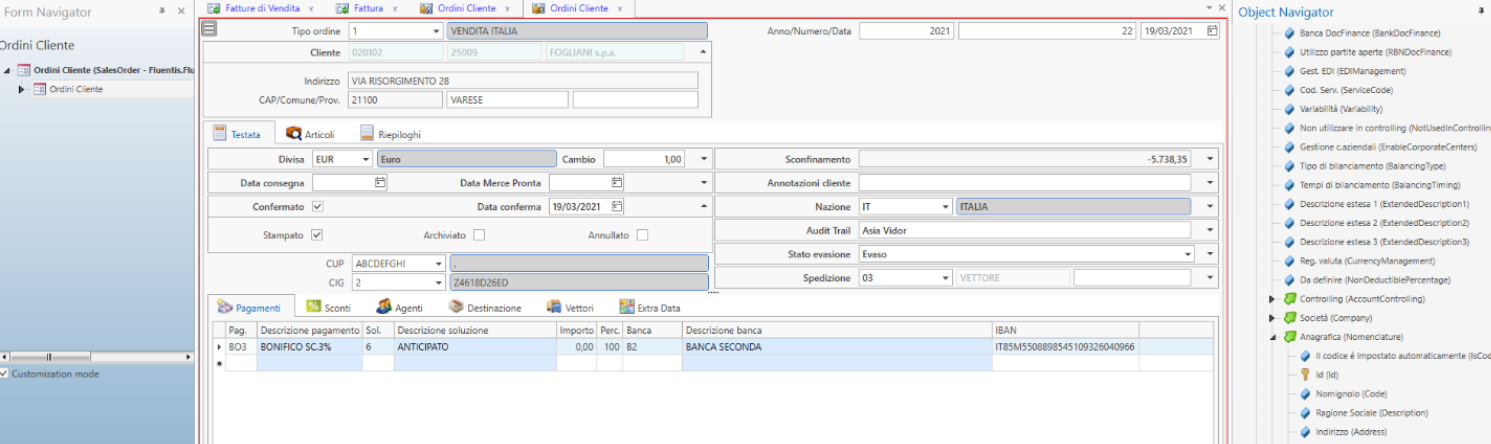
6.3. in the Object Navigator search for the properties to add to the form.
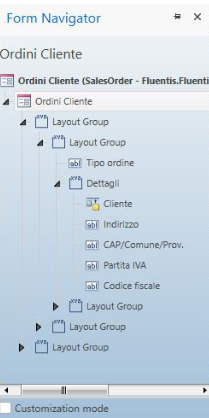
6.4. select the item and drag it into the Form Navigator exactly above the section where the property should be inserted, which will appear in the Fluentis form.
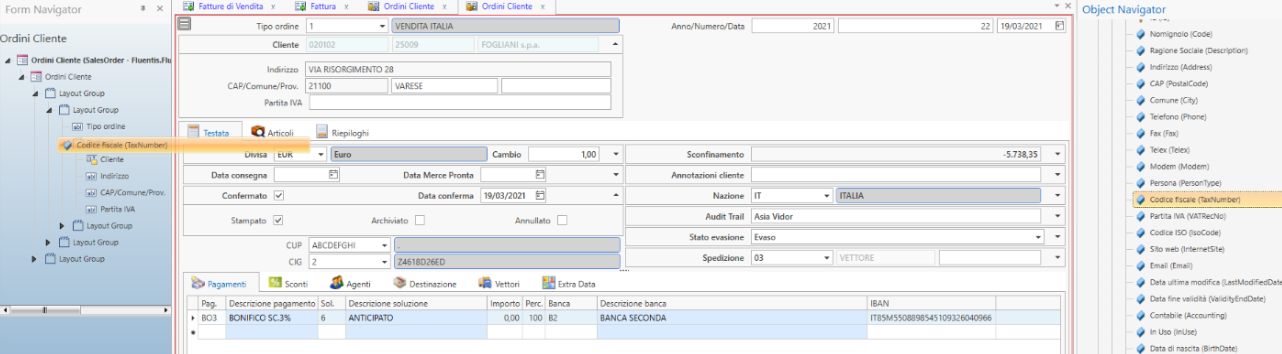
6.5. deselect Customization Mode when the form customization is complete.
Adding Properties to the Form Grid
To add properties to grids, it is not necessary to enter Customization mode.
7.1 in the Object Navigator, search for the properties to add.
7.2 select the item and drag it into the grid. The form will be outlined in red.
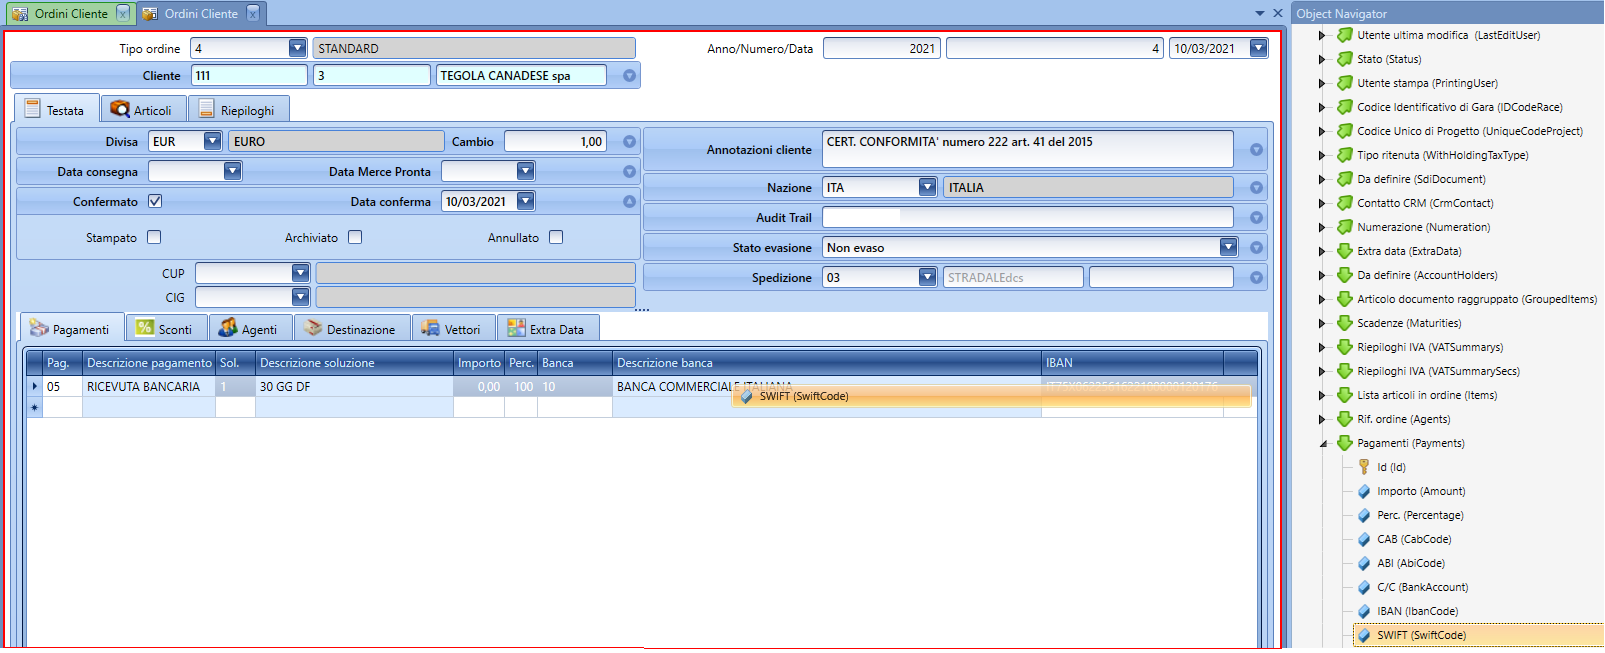
This property will appear as the last column, which will then need to be dragged to the desired position.
- create a profile to save the customization.
- restart Fluentis to make the customization operational.