Installation Prerequisites
Before proceeding to install Fluentis a server must have installed the following.
- Latest Windows Updates
- SQL Server latest with the latest version/cumulative updates available
If multiple servers are used, the roles and features described below must be installed on each server.
If the license includes more than 1 concurrent user, it is recommended to use multiple servers, for web and SQL load, in this way you can share the load and improve performance.
Roles and Features Intallation
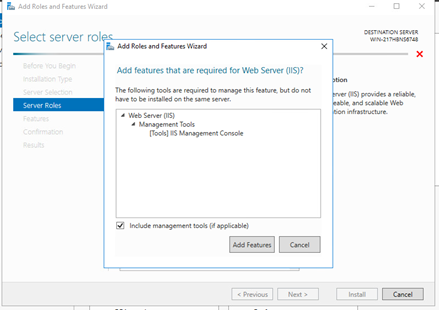
Install from Server Manager app, Add Roles and Features and proceed following the wizard. In Select Server Roles form, add Web Server IIS role:
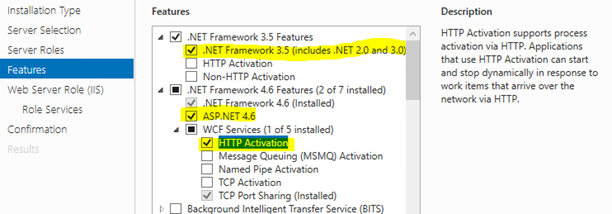
From Features add:
- ASP.NET 4.6 or the latest version available (from ASP.NET 4.6 Features)
- .NET Framework 3.5 (from NET Framework 3.5 Features),
- HTTP Activation (from WCF Services)
Then install:
- Requests Monitor (Healt and Diagnostic)
- Dynamic Compression (Performance)
- WebSocket Protocol (Application development)
Finally press Next/Next/Install, until you get to the end of the installation process.
If we forget to add the features, by repeating the same procedure is possible to add them from the roles.
SQL Server Installation
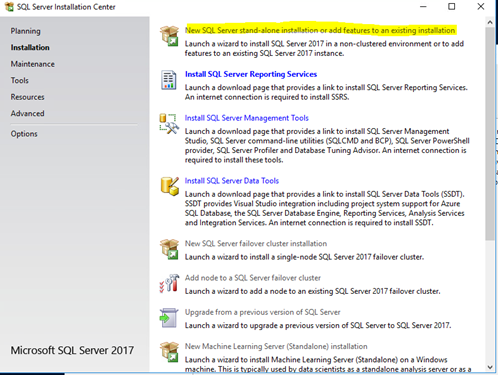
The first step if you have the SQL Server ISO is to mount the disk. After that, start the installation setup by selecting New stand-alone installation.
Then add a rule on the windows firewall. By doing so the warning that appears will be no longer there. The SQL Server port must be opened.
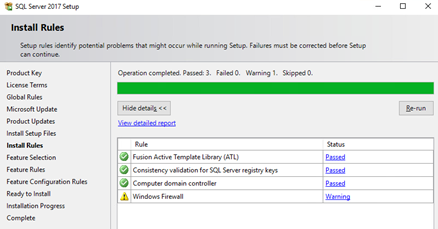
From Control Panel > Windows Firewall > Advanced Settings > right click on Inbound rules > Port
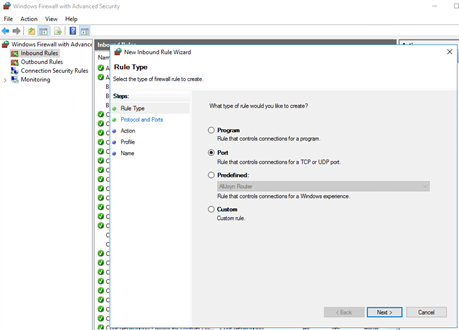
- port number : 1433
- rule name: SQL Server
After the Firewall configuration, we can proceed with SQL Server installation. Inside Features Selection, select:
- Database Engine Services
- Analysis Services
- Client Tools Connectivity
- Integration Services
- Client tools SDK
- SQL Client Connectivity SDK
- Master Data Services
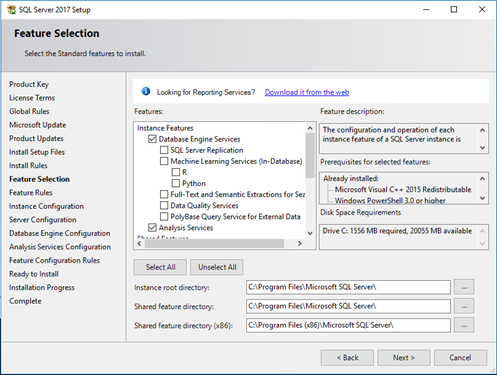
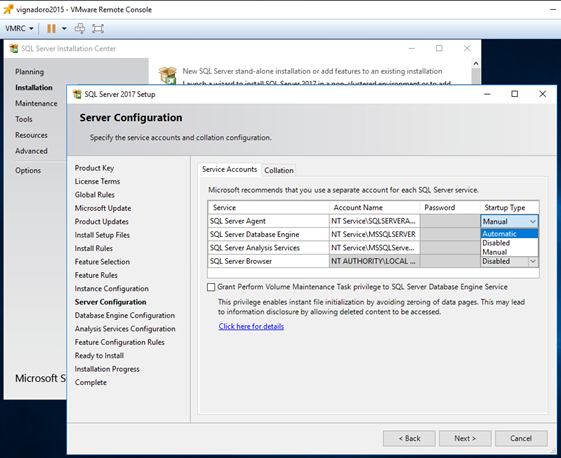
Now, in Server Configuration, set:
- SQL Server Agent in Automatic
- SQL Server Browser in Automatic
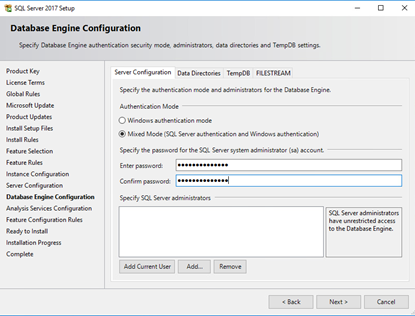
In the Authentication Mode configuration, enter the password for sa user and click on Add the current user. Then modify the paths where SQL will put the Data files inside DataDirectories and TempDB tab.
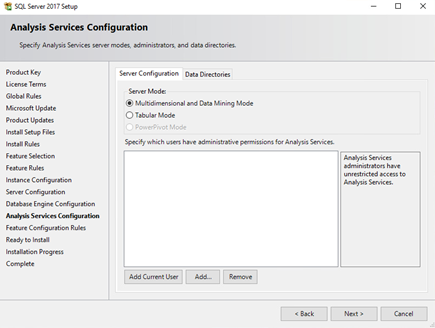
Now select Multidimensional and Data Mining Mode and click Add Current User, and hit next:
For a final check, go to services and check that the services related to the newly created instance are there and are active. To verify this, open the Task Manager, in the services section, check that there are active services related to SQL Server (e.g. SQLAgent $ [instance_name]).
Make sure that the last available cumulative update for SQL Server is installed, for security reasons.
Now the server is ready, and you can proceed with Fluentis Live Update installation.